
In the previous post we spoke about how to get the app set up and configured to your personal equipment profile and how to set up and use the inventory management system. This post will focus on how to manage recipes and prepare for a brewday!
Recipe Library
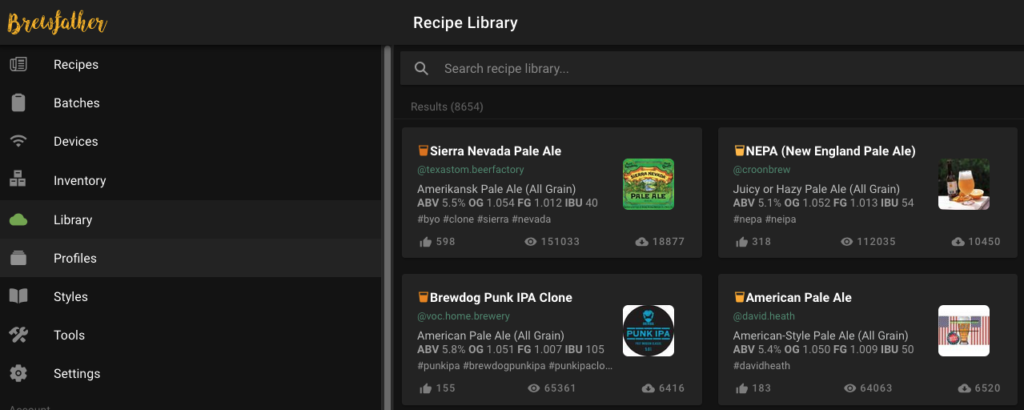
One of the greatest advantages of using Brewfather is its extensive recipe library. You can access a vast collection of recipes, ranging from classic styles to experimental brews. However, not every recipe is a perfect fit for your specific equipment and brewing preferences. Here’s how to adapt a library recipe to your setup.
Recipe builder features
Recipe Scaling
Brewfather recipe development is about accurate recipe scaling, it is absolutely crucial for consistent brewing results. Think of it like baking a cake: if you arbitrarily change the amount of flour, sugar, or eggs, you won’t get the same cake twice. Similarly, in brewing, scaling ensures that the balance of ingredients – grains, hops, yeast – remains consistent regardless of your batch size. This means hitting your target original gravity (OG) and final gravity (FG), which directly impacts the beer’s alcohol content, body, and overall flavour profile. Without accurate scaling, you might end up with a beer that’s too weak, too strong, overly bitter, or disappointingly bland. Brewfather’s scaling tools take the guesswork out of the equation, allowing you to confidently adjust recipes to your desired batch size while maintaining the intended character of the beer. This leads to greater control over your brewing process and, ultimately, more delicious and predictable results every time you brew!
How Does It Work?
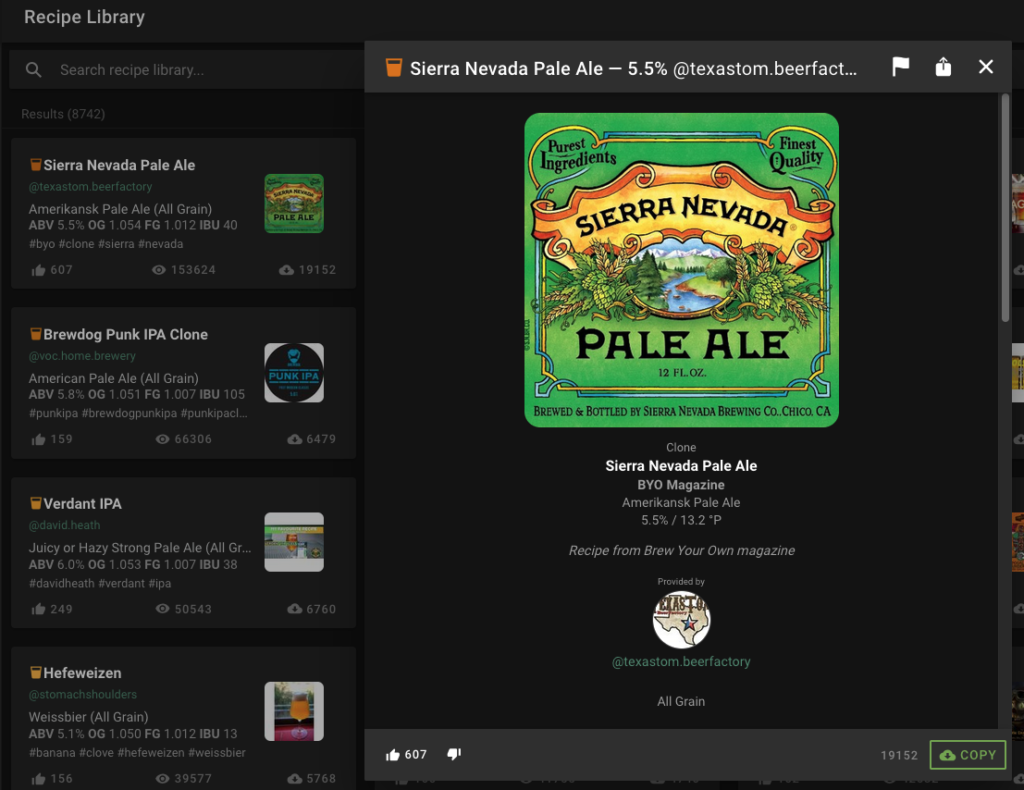
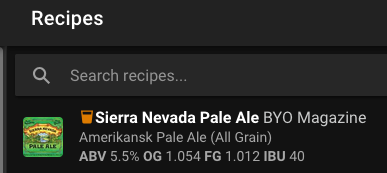
This image shows the most popular recipe from the recipe library, a Sierra Nevada Pale Ale clone from BYO Magazine. If I copy this recipe it will donwload into my recipe folder:
This recipe was designed for a 25L batch but when I import my equiopment profile (50L) you can see the ingredient amount are incorrect.
Clicking the ‘scale’ button will adjust the ingredients proportionally to give the OG, EBC and IBU of the imported recipe. This will leave you with some strange amounts. For example it has left me with 3.4g of Magnum as a bittering hop which is too precise! I will now go through the ingredients and round them to sensible values which are usually multiples of the amounts I can buy them in or portions thereof.
The above method of grabbing a recipe from the Brewfather library and scaling to your equipment profile is very useful when starting out and can make getting going with all grain brewing a lot less daunting than you may have initially anticipated. The next step is coming up with your own recipes!
Recipe and Development Inspiration
The world of beer is overflowing with inspiration! Before diving into recipe creation, it’s incredibly valuable to explore the vast landscape of flavours and styles that already exist. One of the best ways to do this is by critically tasting commercial beers. Don’t just drink them – analyse them! Pay attention to the colour, aroma, flavour, and mouthfeel. What do you like or dislike about them? Take notes, and use those sensory experiences to help with your Brewfather recipe development. Think about beers you love and how you might recreate or tweak those flavors in your own brew.
Beyond tasting, delve into brewing books and online forums. Brewing books offer a wealth of knowledge about beer styles, ingredients, and techniques. I highly recommend The Modern Homebrewer by Jamil Zainasheff and Andy Parker. They often include detailed recipes and explanations of brewing processes. Online forums are a fantastic source of inspiration and information, with countless homebrewers sharing their experiences, recipes, and tips. Engage with the community, ask questions, and learn from others’ successes (and failures!). As you explore, remember the importance of understanding beer styles and their characteristics. Each style has specific guidelines for colour, bitterness, gravity, and flavour. Familiarising yourself with these guidelines will help you make informed decisions when crafting your own recipes. Resources like the BJCP Style Guidelines or Brewers Association Beer Style Guidelines are great places to start your research.
Developing Your Recipe
Once you have chosen your new creation it is time to get it down in the app! Open a new recipe, select your equipment profile and choose your style.

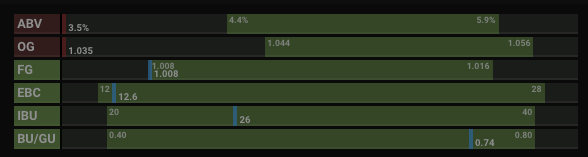
Selecting the style is important to ensure your recipe amounts are staying within the bounds of a specific beer style. This is a good method to ensure your new creation will be drinkable! It is perfectly acceptable to drift out of these boundaries but it is not recommended when you are starting out.
Start adding in the fermentables and hops and playing around with the amounts until your are happy with the recipe as a whole. Remember when you brew your beer to stick to these amounts as this will be critical when reviewing your beer and making decisions on what to tweak for version 2!
Mash Efficiency
You may stick to your recipe perfectly but the readings you take on brewday may not line up with expected values from your recipe. This will likely be to do with mash efficency. Mash efficiency, in the simplest terms, is how effectively you convert the starches in your grains into sugar during the mashing process.
Think of it like this:
- You have a bag of grain with a certain amount of potential sugar locked inside.
- Mashing is like unlocking that sugar using hot water and enzymes.
- Mash efficiency is the percentage of that potential sugar you actually extract into your wort (the sugary liquid that will become beer).
Example:
If your grains have 10 kilos of potential sugar and your mash efficiency is 70%, you’ll extract 7 kilos of sugar into your wort. Higher mash efficiency means you’re getting more sugar from your grains, which leads to:
- Higher gravity (more fermentable sugars for the yeast to turn into alcohol)
- A need for less grain to achieve your desired gravity.
Lower mash efficiency means the opposite: less sugar extracted, lower gravity, and a need for more grain to compensate. It is important to remember that mash efficiency is just one factor that goes into overall brewhouse efficiency. There are several factors that can affect your mash efficiency, and understanding them can help you troubleshoot and improve your brewing process. Here’s a breakdown of some key culprits:
1. Grain Crush:
- Importance: The crush of your grain is arguably the most significant factor influencing mash efficiency. A finer crush exposes more surface area of the grain’s starches to the hot water, resulting in better conversion.
- Problem: A coarse crush leaves larger pieces of grain, making it harder for the water and enzymes to reach the starches.
- Solution: Ensure your grain mill is properly adjusted to provide a consistent, moderately fine crush.
2. Mash Temperature and pH:
- Importance: Enzymes that convert starches to sugars have optimal temperature and pH ranges. If your mash temperature or pH is outside these ranges, the enzymes won’t work as efficiently.
- Problem: Temperatures that are too high or too low can denature the enzymes. Incorrect pH levels can also hinder enzyme activity.
- Solution: Maintain consistent mash temperatures within the recommended range (typically 65-68°C or 149-154°F). Check and adjust your mash pH to the ideal range (around 5.2-5.6).
3. Mash Thickness:
- Importance: The ratio of water to grain in your mash can affect enzyme activity and sugar extraction.
- Problem: A very thick mash can hinder enzyme movement, while a very thin mash might lead to poor conversion.
- Solution: Use a mash thickness within the recommended range (typically 1.25-1.5 quarts of water per pound of grain, or 2.6-3.1 litres of water per kilogram of grain).
4. Mash Time:
- Importance: Giving the enzymes enough time to work is crucial for efficient conversion.
- Problem: A short mash time might not allow enough time for complete conversion.
- Solution: Ensure your mash time is sufficient (typically 60-90 minutes).
5. Sparge Technique:
- Importance: Sparge is the process of rinsing the grain bed with hot water to extract the remaining sugars.
- Problem: Improper sparge techniques, such as channeling (where water forms channels through the grain bed), can reduce efficiency.
- Solution: Use a gentle and even sparge to ensure all parts of the grain bed are rinsed.
6. Grain Type:
- Different grains have different starch contents and characteristics. some grains also have thicker husks that can reduce the efficiency of the conversion.
- Certain adjuncts such as flaked barley or oats can also impede the conversion of starches to sugars.
- The overall grist bill will have an impact on mash efficiency.
So, what value should you input into Brewfather? As long as you put something in the range of 70-85% you will be on the right trac. The actual value will depend on the factors listed above but as long as you are taking accurate recordings and measurements as you go you can dig into improving your efficiency after a few brews.
Brewday!
Once you have settled on your Brewfather recipe development, Brewfather has an amazing brewday tracker. Once you click the ‘brew’ icon your recipe becomes a batch and you will be shown the planning page. Here you will see all your ingredients listed out so you can ensure you have everything in preparation for your brewday. Moving to the Brewing tab will allow you to use timers and step by step sections of your day broken into mash and boil.
That’s everything for this installment. Next we will dive into the post-brew review!