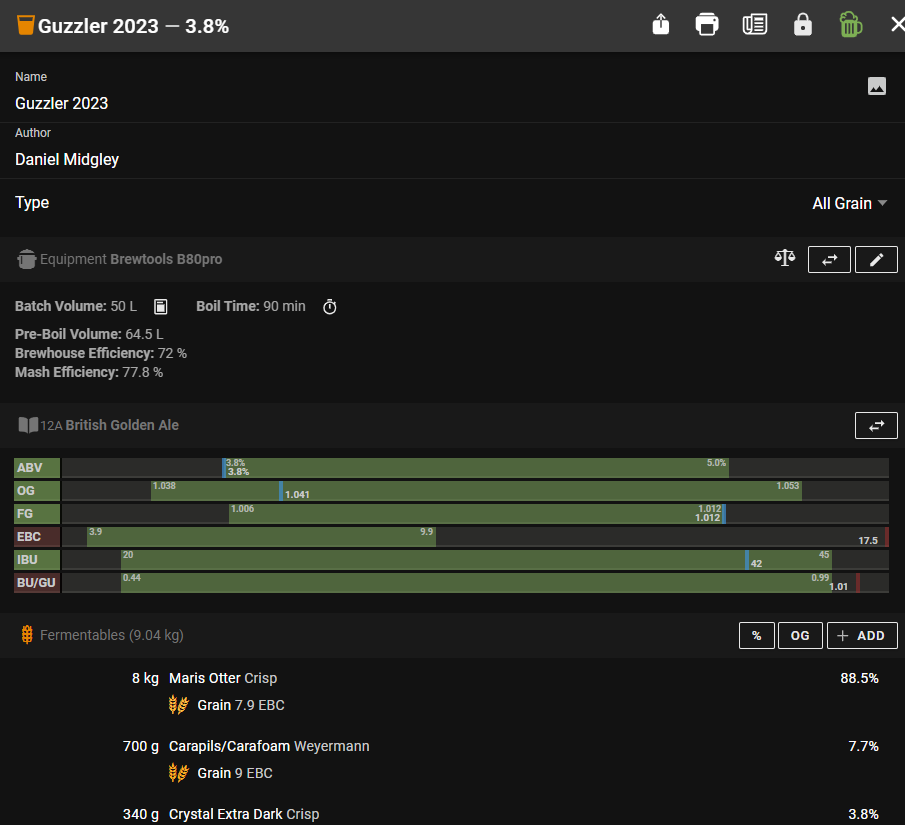
This post should help get the Brewfather app setup for the first time and get you brewing efficiently! Let’s take a quick look at what Brewfather is first of all!
Brewfather, the popular brewing software, wasn’t built in a day. It emerged from the passion of one homebrewer, Thomas Gangsøy, who, like many of us, was frustrated with the limitations of existing brewing tools. He dreamt of a more intuitive and comprehensive platform that could streamline the brewing process and empower brewers of all levels.
In 2016, that dream started to take shape. Gangsøy, armed with his coding skills and a deep understanding of brewing, began developing Brewfather. Initially a personal project, it quickly gained traction within the homebrewing community. Word spread about its user-friendly interface, powerful features, and cloud-based accessibility, attracting a growing user base.
Fast forward to today, and Brewfather has become a staple for countless brewers worldwide. It’s evolved into a sophisticated platform with robust recipe design tools, precise batch tracking capabilities, and seamless integration with brewing hardware. Whether you’re a seasoned all-grain brewer or just starting your homebrewing journey, Brewfather offers a suite of tools to help you brew better beer.
In this blog series, we’ll delve into the key features of Brewfather and explore how you can leverage this powerful software to enhance your brewing experience. From crafting recipes to managing your inventory and monitoring fermentation, Brewfather puts the control in your hands. So grab your favorite brew, settle in, and let’s unlock the potential of this game-changing brewing companion!

Brewfather app setup
Brewfather has two versions. From the docs:
“Brewfather offers both a free and a paid version. The free version has access to most of the features. The paid version includes advanced features such as device integrations, inventory tracking, and export/import. You can upgrade to the paid version by subscribing to Brewfather Premium.”
The premium version is $23.99/year which in £ is currently just under £20. That’s a lot of features for less than £2 a month! The first 30 days you will receive Premium for free! I recommend starting out on a laptop or PC to get started and can then move to the app later on.

Once you’ve logged in and chosen your version you will be presented with a bar on the left hand side with options to dive in and create recipes, monitor batches or devices, update your inventory or dive into the guts of the settings. I would recommend starting out by setting your units in the settings. Are you specific gravity or plato? EBC or SRM? Fahrenheit or celsius? Grams or ounces?
Once you’ve logged in and chosen your version you will be presented with a bar on the left hand side with options to dive in and create recipes, monitor batches or devices, update your inventory or dive into the guts of the settings. I would recommend starting out by setting your units in the settings. Are you specific gravity or plato? EBC or SRM? Fahrenheit or celsius? Grams or ounces?
Once you have got the basics out of the way let’s set up the app.
- Download Brewfather app from App Store/Google Play
- Open app and tap “Sign In”
- Enter your Brewfather account email/password
- Allow notifications when prompted
- Verify sync by checking recipes appear
- Enable automatic sync in Settings > Data
Equipment Profile Configuration
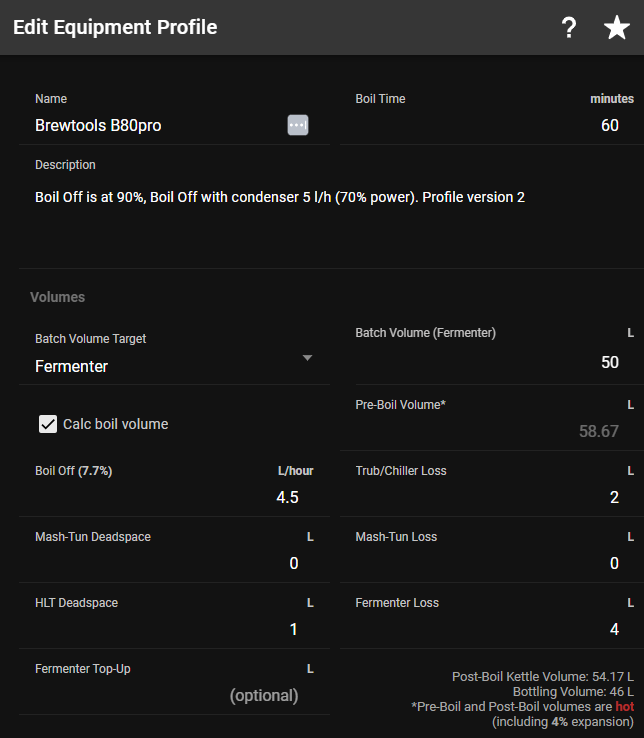
Brewfather’s equipment profiles are your digital representation of your physical brewery. This is where you tell the software about your specific setup, enabling it to generate incredibly accurate recipes and predictions. A well-configured equipment profile is the cornerstone of consistent and successful brewing.
Here’s a breakdown of how to input your equipment details in this step of the Brewfather app setup, keeping in mind that Brewfather is flexible enough to accommodate a wide range of brewing systems and volumes:
1. Fermentation Vessels:

Volume is Key: Accurately record the total volume of your fermenters. This is crucial for calculating headspace and avoiding messy blowoffs!
Losses Matter: Factor in any volume lost to trub and yeast sediment. This ensures your final packaged volume is on point. Brewfather allows you to specify a “Loss to Trub and Chiller” value within the fermenter profile.
Temperature Control: If you use temperature-controlled fermentation, note the specifics of your setup (e.g., fridge capacity, temperature controller model). While not directly entered into Brewfather, this information helps you understand the limits of your fermentation temperature control.
2. Kettle Specifications:
- Boil-Off Rate: Determine your average boil-off rate. This is the amount of wort lost to evaporation per hour. Brewfather uses this to adjust your recipe water volumes. You can perform a test boil to measure this accurately. If you use a steam hat this can be different.
- Kettle Volume: Input your kettle’s total volume. This is essential for ensuring you have enough space for your wort and avoiding boil-overs.
- Deadspace: Account for any “deadspace” in your kettle – the volume of wort below the pickup tube that can’t be transferred to the fermenter.
3. Mash Tun Details:
Deadspace: Similar to your kettle, account for any deadspace in your mash tun.
Mash Tun Volume: Record the total volume of your mash tun.
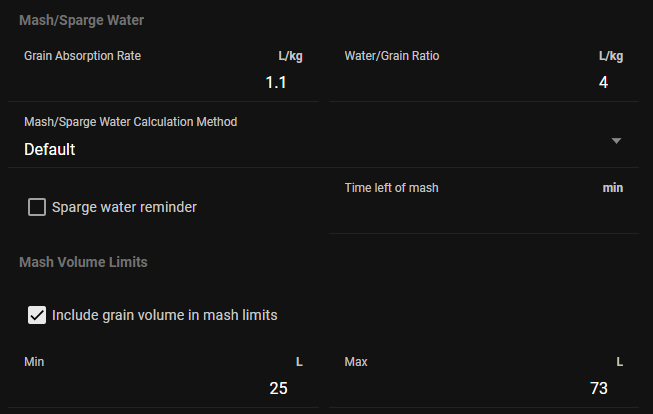
Grain Absorption: Specify your typical grain absorption rate. This is the amount of wort retained by the grain bed after lautering. A common starting point is 0.1 gallons per pound of grain (or 1 liter per kilogram), but this can vary.

4. Loss Calculations:
Brewfather allows you to fine-tune your loss calculations at various stages:
- Mash Tun Losses: These can include losses to the grain bed and mash tun deadspace.
- Lauter Tun Losses: If you use a separate lauter tun, account for any losses here.
- Kettle Losses: Include losses to the kettle walls and trub.
- Transfer Losses: Consider losses during transfer to the fermenter.
By meticulously tracking these losses, you can improve your brewhouse efficiency and ensure your recipes hit their target gravities. This will not be accurate first time, take notes during each brew and iterate these values to sneak up on a reliable profile.
5. Efficiency Settings:
- Brewhouse Efficiency: This is the overall percentage of sugars extracted from your grains that make it into the fermenter. Brewfather uses this to calculate your grain bill. Start with a common value like 70% and refine it based on your actual brew day results.
- Mash Efficiency: This refers specifically to the efficiency of your mash conversion. While Brewfather primarily uses brewhouse efficiency, understanding your mash efficiency can help troubleshoot any issues in your process.
Tips for Different Systems and Volumes:
- BIAB Brewers: Pay close attention to grain absorption rates, as these can significantly impact your final volume.
- Small-Batch Brewers: Losses become more significant with smaller batches. Be precise with your measurements and consider using smaller equipment to minimise deadspace.
- Large-Batch Brewers: Ensure your equipment can handle the increased volume and adjust your boil-off rate accordingly.
Taming the Beast: Inventory Management with Brewfather
Ever found yourself scrambling for that last ounce of hops on brew day? Or discovered a stale bag of malt lurking in the back of your storage? Say goodbye to those frustrating moments with Brewfather’s inventory management system! This final Brewfather app setup step helps you keep track of your brewing ingredients, ensuring you always have what you need, when you need it.
Here’s how to harness the power of Brewfather’s inventory features:
1. Enable Inventory Tracking:
First things first, make sure inventory tracking is switched on. Head to the Settings page and enable Inventory Stock. Now you’re ready to start building your digital pantry.
2. Adding Ingredients:
- The Inventory Page: Navigate to the Inventory page. Here, you’ll find separate tabs for fermentables, hops, yeast, and miscellaneous ingredients.
- Adding New Items: Click the “+ Add” button within each tab to add new ingredients. Brewfather boasts an extensive database, so you’ll likely find what you need. If not, you can easily add custom ingredients with all their relevant details.
- Detailed Information: For each ingredient, you can record vital information like:
- Quantity: How much do you have on hand? Be as precise as possible (e.g., 1.5 lbs, 500g).
- Unit Cost: Track the price of your ingredients to monitor your brewing budget.
- Batch/Lot Number: This is helpful for tracking specific batches of ingredients, especially for hops and yeast.
- Best Before Date: Never let ingredients expire again! Set reminders to use up those hops before they lose their potency.
- Storage Location: Organise your inventory by noting where each item is stored (e.g., “Hop Fridge,” “Dry Storage”).
3. Updating Your Inventory:
- After Brew Day: Deduct the ingredients used in your latest brew from your inventory. Brewfather makes this easy by automatically suggesting adjustments based on your brewed recipes.
- Manual Adjustments: Manually add or remove items as needed. Bought a new bag of grain? Add it to your stock. Used some hops for dry-hopping? Update the quantity.
4. Utilising Inventory in Recipes:
- Real-Time Availability: When creating a recipe, Brewfather will show you which ingredients you have in stock and in what quantities.
- Shopping Lists: Need to make a trip to the homebrew store? Brewfather can generate a shopping list based on your recipe and current inventory.
5. Advanced Inventory Management:
- Multiple Batches: Track different batches of the same ingredient (e.g., hops with different alpha acid percentages).
- Custom Fields: Add your own custom fields to track specific information relevant to your needs.
Now that the Brewfather app setup is complete your digital brewery is ready to go! Have a play around with more settings and spend some time on those equipment profiles! Next time we will tackle recipe development and planning!

