Introduction
Water might seem like the most basic ingredient in brewing, but it’s actually the secret weapon of world-class brewers! Did you know that water makes up over 90% of your beer? That’s right – water isn’t just a simple ingredient; it’s the foundation of every great brew. Professional brewers obsess over water chemistry, and today, I’m going to show you why water is the unsung hero of homebrewing. Imagine transforming your homebrew from good to absolutely mind-blowing, just by understanding a few key water chemistry principles. Whether you’re brewing a crisp pilsner or a robust stout, the right water can make all the difference!
Understanding Water Chemistry Basics
What you will learn:
- Demystify water chemistry
- Explain why water matters in brewing
- Introduce fundamental water chemistry concepts
Water chemistry in homebrewing refers to the process of understanding and adjusting the mineral content and pH of your brewing water to optimise the flavour and quality of your beer. It might sound intimidating, but even basic adjustments can make a noticeable difference!
Why Water Chemistry Matters
- Enzyme Activity: During the mash (where you steep grains to convert starches into sugars), enzymes are crucial. These enzymes are highly sensitive to pH levels. The right pH ensures they work efficiently, leading to better sugar conversion and ultimately, a better beer.
- Flavour: The minerals in your water directly impact the taste of your beer. Some enhance malt flavours, while others accentuate hop bitterness. Balancing these minerals is key to achieving the desired flavour profile.
- Yeast Health: Minerals like calcium are essential for yeast health and performance during fermentation. Proper mineral levels contribute to a healthy fermentation and a clean-tasting beer.
The Key Minerals:
- Calcium (Ca): Lowers mash pH, aids in enzyme activity, and promotes yeast health. Product Link
- Magnesium (Mg): Similar to calcium but has a less significant impact on pH.
- Sodium (Na): In low concentrations, it can round out flavours. High concentrations can make the beer taste salty.
- Chloride (Cl): Enhances malt sweetness and fullness.
- Sulfate (SO4): Accentuates hop bitterness and dryness.
- Bicarbonate (HCO3): Increases pH and alkalinity. High levels can lead to harsh bitterness.
How water profile affects different beer styles
- Balance: Different beer styles require different balances of minerals to achieve their characteristic flavours.
- Historical Accuracy: Many classic beer styles are associated with specific regions that have unique water profiles. Brewers often try to emulate these profiles to recreate authentic flavours.
- Flavour Emphasis: Water chemistry can be manipulated to accentuate certain flavour characteristics, such as malt sweetness, hop bitterness, or overall dryness.
Examples of Water Profile Influence on Beer Styles
- Pilsner: This style originated in Pilsen, Czech Republic, which has very soft water (low mineral content). This contributes to the beer’s crisp, clean taste and allows the delicate hop aromas to shine through. Replicating this profile is crucial for brewing a true-to-style Pilsner.
- India Pale Ale (IPA): Historically, IPAs were brewed in London, which has harder water with high sulfate levels. Sulfates accentuate hop bitterness, which was desirable to preserve the beer on its long journey to India. Modern IPAs, especially West Coast styles, often utilise high sulfate levels to enhance hop bitterness and dryness.
- Stout: Dublin, Ireland, is known for its dark stouts, like Guinness. The water there has high bicarbonate levels, which contribute to a lower mash pH and a smoother, less acidic flavour profile. This is important for balancing the roasted barley character in stouts.
- German Lagers (e.g., Munich Dunkel, Bock): These styles often benefit from water with moderate mineral content, including calcium and bicarbonate. This helps to enhance the malt flavours and provide a balanced profile.
Basic Terminology
- Alkalinity: A measure of water’s ability to resist changes in pH, specifically its ability to neutralize acids. It’s primarily influenced by bicarbonate and carbonate ions.
- Hardness: A measure of the total concentration of dissolved minerals, primarily calcium and magnesium. It’s often expressed as calcium carbonate (CaCO3) equivalents.
- Residual Alkalinity (RA): A calculated value that helps predict the mash pH based on the water’s mineral content. It’s a useful tool for determining if you need to make pH adjustments.
- Mash: The process of steeping grains in hot water to convert starches into fermentable sugars.
- Wort: The sugary liquid extracted from the mash, which is then fermented to produce beer.
Basic Tools (Good Starting Point)
- pH Meter: This is essential for measuring the pH of your mash and wort. Look for one with at least two-point calibration for better accuracy. Product Link
- Pros: Relatively affordable, provides precise pH readings.
- Cons: Requires calibration and proper storage.
- pH Test Strips: These can give you a rough estimate of pH but are not as accurate as a meter. Useful for quick checks but not for precise adjustments. Product Link
- Pros: Inexpensive and easy to use.
- Cons: Less accurate than a meter, can be difficult to read.
- Water Hardness Test Strips: These can give you a general idea of your water’s hardness (calcium and magnesium content). Product Link
- Pros: Simple and quick to use.
- Cons: Only provides a rough estimate of total hardness, not individual mineral concentrations.
More Advanced Tools (For Greater Precision)
I would not image a use case where a homebrewer would have these specific devices but they are available for a cost!
- Digital Titrator or Test Kits: These kits use chemical reactions to measure specific mineral concentrations like chloride and sulfate. More accurate than test strips but require some practice.
- Pros: More accurate than test strips for specific minerals.
- Cons: Can be more expensive and time-consuming than test strips.
- Photometer: A device that measures the colour intensity of a solution to determine the concentration of specific substances. Some photometers are designed specifically for brewing water analysis and can measure multiple parameters.
- Pros: Highly accurate and can measure multiple minerals.
- Cons: More expensive than other options.
Essential Accessories
- Distilled Water: For calibrating your pH meter and rinsing equipment. Product Link
- Calibration Solutions: For calibrating your pH meter to ensure accuracy. Product Link
- Beakers and Graduated Cylinders: For accurate measurement of water and brewing salts. Product Link
- Stirring Rods: For mixing solutions and ensuring proper dissolution of salts. Product Link
- Notebook and Pen: To record your water analysis results and brewing adjustments. Product Link
4. Getting a Professional Water Report
- Ward Labs: A popular choice among homebrewers, they offer comprehensive water analysis packages. Only available in the US.
- Local Water Authority: Your local water supplier can provide a report on the general composition of your tap water, though it may not include all the specific minerals relevant to brewing.
Reverse Osmosis (RO) Water
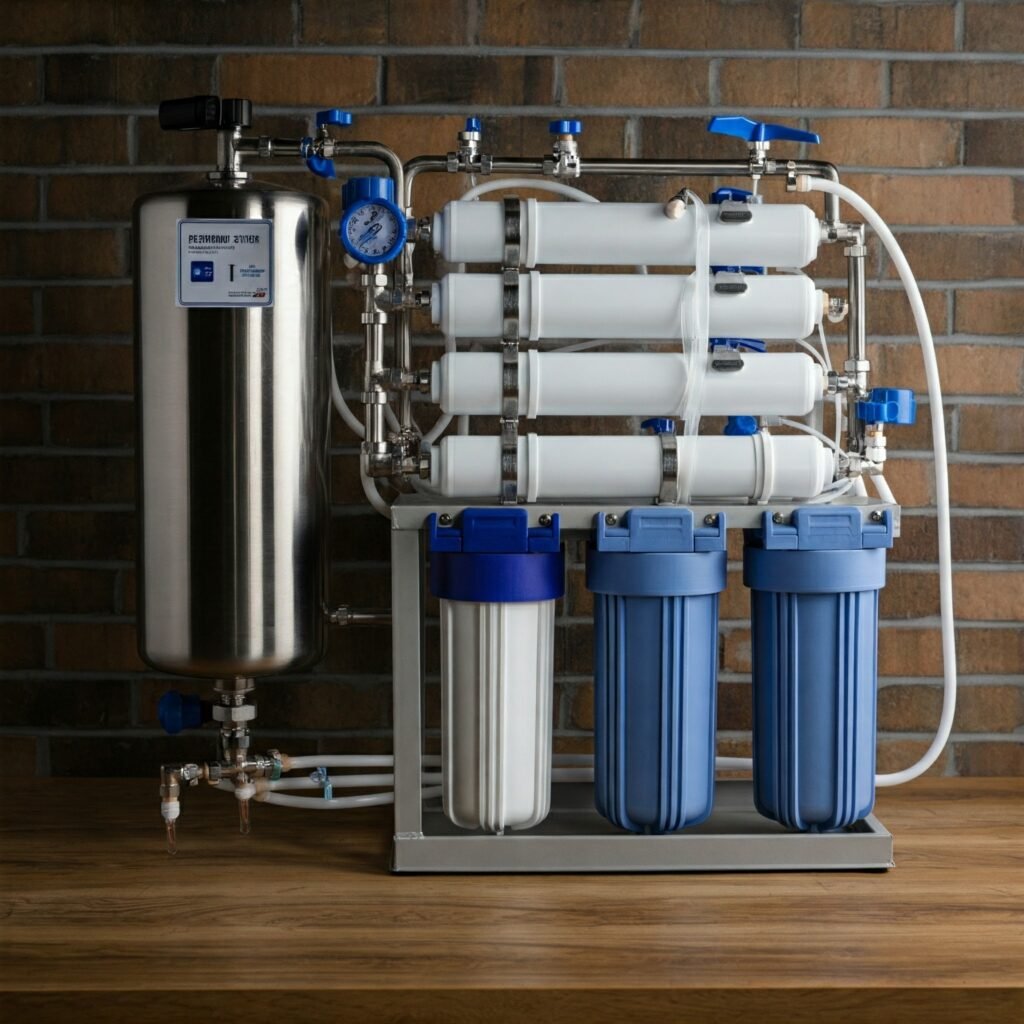
Reverse osmosis is a water purification technology that uses a semipermeable membrane to remove ions, molecules, and larger particles from drinking water. In the context of homebrewing, RO systems are used to create a “blank slate” of water by removing most of the minerals and impurities. Here in the UK they are not as common as in the US as our tap water is much better but they are available. Amazon has some good options.

Here’s how RO fits into water analysis and brewing:
1. Starting with a Clean Slate
- Removal of Minerals: RO systems effectively remove 90-99% of dissolved minerals, including calcium, magnesium, sodium, chloride, sulfate, and bicarbonate. This gives you a base water that is very low in mineral content, similar to distilled water. You can check this using a dissolved solids meter (TDS meter).
- Consistency: Using RO water provides consistency from batch to batch, as you eliminate variations in your tap water supply.
2. Building Your Desired Water Profile
- Precise Control: Because RO water is essentially pure, you have complete control over the mineral content of your brewing water. You can add specific brewing salts to achieve the ideal profile for any beer style.
- Flexibility: You can easily adjust your water profile for different beer styles without being limited by the starting mineral content of your tap water.
3. Considerations When Using RO Water
- Mineral Additions: Since RO water is nearly devoid of minerals, you’ll need to add brewing salts to provide the necessary ions for enzyme activity, yeast health, and flavour.
- pH Adjustment: RO water has very low buffering capacity, meaning it’s more susceptible to pH changes. You’ll need to carefully monitor and adjust the pH of your mash.
- Cost and Maintenance: RO systems can be more expensive to purchase and maintain than other water treatment methods.
4. How RO Relates to Water Analysis
- Less Need for Detailed Analysis: If you’re using RO water, you don’t need to get a detailed analysis of your tap water, as you’ll be starting with a clean slate. However, it can still be helpful to know the general quality of your tap water.
- Focus on Building Profiles: Instead of analysing your source water, you’ll focus on calculating the necessary mineral additions to achieve your desired brewing water profile.
Practical Water Chemistry Techniques
Now you have your background knowledge in place it is time to get practical. The best tool for this is Brewfather. It has a tool where you can enter your starting water profile and your end profile, volumes of water and then it will calculate the mineral additions for you.
Starting Profile
This can be bottled mineral water, distilled water, reverse osmosis water or tap water. The important knowledge is what the key minerals present are. Bottled water will likely have the values on the label, distilled water can be assumed to be 0, RO water will have (Ca2 – 1, Mg2 – 1, Na – 8, Cl – 4, SO42 – 1 and HCO3 – 16) and tap water will either need a recent report from the local water company or results form an at-home testing kit.
In Brewfather you can enter the water section and click ‘CALC’.

At this point of the recipe you should have entered the grain and hop amounts. The equipment profile will have the water volumes required. All that is left is the additions.

Select the ‘Source Profile’:

Desired Profile
Next, select your ‘Desired Profile’:

Finally, click ‘auto’ and it will calculate how many of each mineral is required:

Note:
- If you do not have certain water additions available you can uncheck them by clicking the little cog wheel in the above screenshot and de-selecting what you do not have. Ensure you click ‘auto’ once more after altering those settings.
- If you only want to add the additions to the mash, de-select ‘Sparge’ below:

The final step is to alter the pH to the desired range, typically between 5.2 and 5.5. You can do this with acid. Select the type of acid you have, the strength and add in a number, you will see the pH value change and you can higher or lower this acid amount to bring it to the desired value.

I recommend this acid: Lactic Acid 80%
Water chemistry might seem complex, but it’s your gateway to brewing exceptional beer. By understanding these principles, you’ll transform from a casual homebrewer to a true brewing scientist. Don’t be intimidated – start small, experiment, and watch your beer quality soar!

